/blogs/tutorials.atomsafebet - Tutorials2025-03-07T14:23:15-05:00safebet/blogs/tutorials/how-to-make-bee-royal-icing-transfers2024-02-28T14:15:02-05:002024-08-14T14:31:09-04:00How to Make Bee Royal Icing Transferssafebet/blogs/tutorials/using-cookie-stencils2024-02-20T16:25:12-05:002024-02-20T16:30:02-05:00Using Cookie Stencilssafebet/blogs/tutorials/assembling-and-decorating-a-gourmet-yellow-cake-with-chocolate-mousse-frosting2024-02-06T16:33:03-05:002024-04-01T06:34:51-04:00Assembling and Decorating a Gourmet Yellow Cake with Chocolate Mousse FrostingAnn Digital/blogs/tutorials/how-to-store-royal-icing2024-01-30T09:24:22-05:002024-07-15T10:59:43-04:00How to Store Royal IcingAnn Digital
We've all been there- you didn't realize that your royal icing recipe makes an entire bowlful, and now you're wondering how to store the excess. Never fear, royal icing can actually be stored for a fairly long time, read below to find out how to store it!
A word of caution:ĚýWe do not recommend using raw eggs to make royal icing, and these storage techniques are only applicable to icing recipes made with shelf-stable ingredients, like meringue powder.
Room Temperature:
Royal Icing can be stored at room temperature for up toĚý4 weeks.ĚýYou heard that right. Be sure to store in an airtight container to avoid crusting. You can even keep it in the same piping bags that you used.
If you notice separation within the icing, simply massage the piping bags until all ingredients are well mixed again.
Refrigerator:
Royal icing can be stored for up toĚý6 weeksĚýin the refrigerator. Be sure to keep in an airtight container to prevent it from drying out. Allow it to warm to room temperature before getting b ack to decorating.
Freezer:
Yes, you can freeze royal icing, and it thaws relatively quickly! We recommend storing in Ziploc bags, pressing the bags down so that they will store flat. This saves valuable room in your freezer. You can freeze royal icing for up toĚý6 weeks.ĚýBe sure to date the bags when freezing!
Bonus: How to Get Rid of Royal Icing Crust:
If you stored your royal icing and are seeing a bit of crust on the sides of the bowl or on top of the royal icing, never fear! You do want to get rid of the crystalized sugar before using the icing, to save yourself some headache. Simply spritz the crusty bits with water and let sit for a couple of minutes. Mix the crusty bits slowly but thoroughly into the icing, and continue this process until the icing is fully incorporated.
There you have it! Now that you know how to store royal icing, read up onĚýhow to store sugar cookies.
]]>
/blogs/tutorials/how-to-make-royal-icing-transfers2024-01-29T17:51:18-05:002024-03-07T10:20:06-05:00How to Make Royal Icing TransfersAnn Digital
Royal icing transfers offer a great way to quickly add designs to a baked creation. The hardened royal icing can be piped in a myriad of designs and applied to baked goods like cakes, cookies, and cupcakes. They keep at room temperature for up to 3 weeks, and can be made ahead to add detail and layers to any baked dessert. Below are the basics of royal icing transfers, as well as some additional resources for finding royal icing transfer designs.
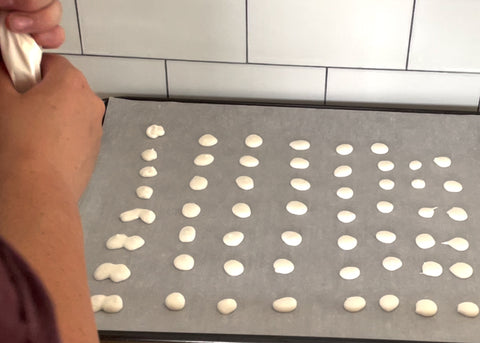
Step 1:ĚýLay a sheet ofĚýparchment paperĚýon a rimmed baking sheet.
Step 2:ĚýPipe your designs onto this sheet. If piping many of the same designs, it may help to print out a sheet of paper printed with the repeated design so that you can trace the pattern with your piping bag. Move the icing around with a toothpick or scribe to ensure that you're getting the shape and coverage you need.
Step 3:ĚýLet the transfers firm up in a dry, room-temperature location for about 24 hours, or until they can be easily removed from the parchment paper.
Step 4:ĚýOnce you're ready to apply the royal icing designs to your cookie, simply pipe a dot of medium-stiff royal icing onto the back of your transfer and adhere to your cookie (or cake--these work great for cakes and cupcakes too!). It's easiest to adhere the royal icing transfers when the base frosting or icing on your dessert is still wet and hasn't fully set up.
Tips for royal icing transfers:
Be sure to make a few extra! While it's always a bummer when this happens, a few of your royal icing transfers are bound to break.
Test pipe your royal icing on a scrap piece of parchment paper before starting. You may need to adjust the consistency so that it's easy to pipe but not runny.
Don't pipe your transfers too thin, as they are susceptible to break when removing them from the parchment paper.
If your transfers are sticking to the parchment paper, they aren't dry. Wait for a few more hours to ensure that they are dry, or place the transfers under a fan to speed up the process.
Always use a stiff or medium-stiff royal icing consistency, as thinner consistencies will run and you'll lose your design details as they dry.ĚýLearn more about royal icing consistencies>>
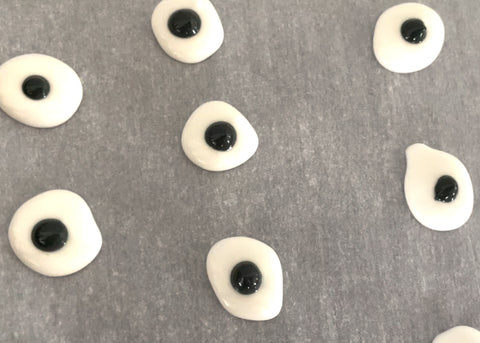
If adding sprinkles or non pareils to your royal icing transfer, be sure to do that while the transfer is still wet, immediately after piping.
Use gel food coloring when dying your royal icing for transfers, as it will not affect the viscosity of your icing.Ěýsafebet's ultra-concentrated gel food coloringĚýallows you to achieve bold, vibrant colors with just a few drops.
There you have it! Practice makes perfect with royal icing transfers, but once mastered they are an essential tool in any dessert artist's toolbox. Below are a few of our favorite places to get royal icing transfer pattern sheets:
]]>
/blogs/tutorials/royal-icing-consistencies2024-01-26T11:02:40-05:002025-02-03T14:55:56-05:00Royal Icing Consistencies: What's the Difference?safebet
You're ready to decorate cookies. You have your piping bags, cooled cookies, and royal icing mix ready to go. You've checked out some tutorials, and see that they mention "flood icing" and "piping consistency." What do these words mean? We're here to help you demystify the terms around royal icing so that you can achieve picture-perfect decorated cookies every time.
Before we dive in, it is important to note that achieving the correct consistency is more of an art than a science. There isn't really a specific formula for creating the right consistency, but getting the correct consistency is something that you will learn over time. Play around with it, and you'll eventually get perfectly decorated cookies every bake.
Watch: How to Mix Different Royal Icing Consistencies:
Most royal icing recipes make a very thick icing consistency. To thin the icing, simply add water one drop at a time. Add tiny amounts of water-you can always add more but you can't take it away!
Pro tip: Use a mini spray bottle to spritz your icing with water to thin it. The spray will ensure even coverage (read: less mixing), and also ensures that you don't add too much at once.
How to thicken royal icing:
Confectioner's sugar is the answer. To thicken your icing, add confectioners sugar one teaspoon at a time to achieve your desired thickness. Mix well while adding to incorporate all of the dry ingredients.
What is Icing Count?
This is a term you might see used by cookie artists. Once you have mixed your royal icing, use a butter knife to cut a 1" deep line through your bowl of icing. Once the line is drawn, count the seconds until it disappears. The number of seconds you count are referred to as the icing count.
Consistency Types:
Ěý
Stiff Consistency
Most royal icing recipes will result in this consistency. This icing will hold its shape, and is great for decorative piping. If you have a larger-gauge piping tip or would like to pipe flowers, this is the correct consistency.
Pro tip: when mixing this icing, mix on medium-low speed. The icing should be dense without air bubbles. Too much air will cause your piped details to collapse.
Icing Count: Forever-the line in your icing should hold indefinitely, the icing is that stiff.
Consistency: Cream cheese or buttercream
Uses: Piping decorative flowers, embroidery, or details. Best for wider-gauge piping tips.
Piping/Outline Consistency:
This consistency is a bit thinner than stiff consistency. It will typically take 2-4 drops or sprays from a bottle to achieve the correct piping consistency. Piping consistency royal icing will form soft peaks in the bowl that slowly lose their form. If it is too thick, the frosting will break as you squeeze it from your piping bag. If it is too thin, it will run off of the cookie. This icing consistency is used for piping borders and for lettering and details. When used as a border, it will form a wall around your cookie so that your flood icing stays contained.
Icing Count: 25-30 seconds
Consistency: Toothpaste or soft-serve ice cream
Uses: Piping borders, lettering, & details
Flood Consistency:
Flood consistency icing is used for filling large areas in the cookie. It can be easily moved around with a toothpick or scribe tool to ensure full coverage of an area. It is also used for wet-on-wet piping techniques, which is when you pipe directly onto wet icing. This technique is great for marbling and for creating designs (like polka dots) that are all on the same plane. If you want dimension to your decorating, wait for the flood icing to dry before applying details with piping consistency icing. This icing takes the longest to dry, as it is the wettest consistency, so we recommend using a fan to dry your cookies.
Pro Tip: If filling a large area, pipe squiggles on the inside of the filled area to prevent dimpling or collapsing in the frosting.
Icing Count: 5-8 seconds
Consistency: Honey or Shampoo
And there you have it! A crash course in royal icing. Getting the right consistency takes a lot of practice, but understanding the terms and playing around with your icing consistency will result in beautiful, professional-looking decorated cookies.
]]>
/blogs/tutorials/how-to-wrap-a-cake-with-fondant2024-01-09T09:15:24-05:002024-03-29T09:21:59-04:00How to Wrap a Cake with FondantDavid Gibson/blogs/tutorials/how-to-hand-letter-without-a-projector2024-01-09T09:15:03-05:002024-03-29T09:45:58-04:00How to Hand-Letter Without a ProjectorDavid Gibson